
Old floor adhesive can turn a simple project into a mess fast. One patch scrapes up like dry paint, while the next smears like tar.
That’s why guessing usually costs time, blades, and patience. If you want a clean slab for tile, vinyl, laminate, or a coating, the best first step is figuring out what’s stuck to the concrete and choosing the right removal method for that residue.
Start by identifying what’s on the slab
Not all residue acts the same. Carpet glue, vinyl adhesive, thin mastics, and old black cutback all respond to different tools.
Homeowners often say they need to remove mastic concrete, when they really mean removing old glue from a slab without damaging it. That difference matters, because the wrong method can spread the mess or create unsafe dust.
Use this quick guide before you start:
| Residue type | What it usually looks like | Best first move |
|---|---|---|
| Carpet glue | Tan, yellow, or amber, often brittle | Dry scrape, then spot-treat sticky areas |
| Vinyl adhesive | Beige or off-white, thin film | Scrape, then use remover if needed |
| Black cutback mastic | Black, tar-like, often under old tile | Stop and check age before grinding |
| Thick construction adhesive | Ridges or blobs | Chisel or scrape high spots first |
If the residue is black cutback mastic, treat it with extra caution.
If the adhesive is old, black, and you don’t know what it is, don’t grind it until asbestos has been ruled out.
Many older mastics can contain asbestos. If the home is older, or the flooring was installed decades ago, get the material tested before sanding, grinding, or using aggressive removal. Scraping with minimal dust is one thing. Making fine airborne dust is another.
Also, check for moisture signs while the floor is exposed. White powder, damp spots, or past adhesive failure can point to slab issues. That matters later, especially if you plan tile, glue-down flooring, or concrete moisture testing before a coating.
Tools and safety steps that save time later
The right setup keeps the job controlled. It also keeps you from turning one room into a dust storm.
For most jobs, you’ll want:
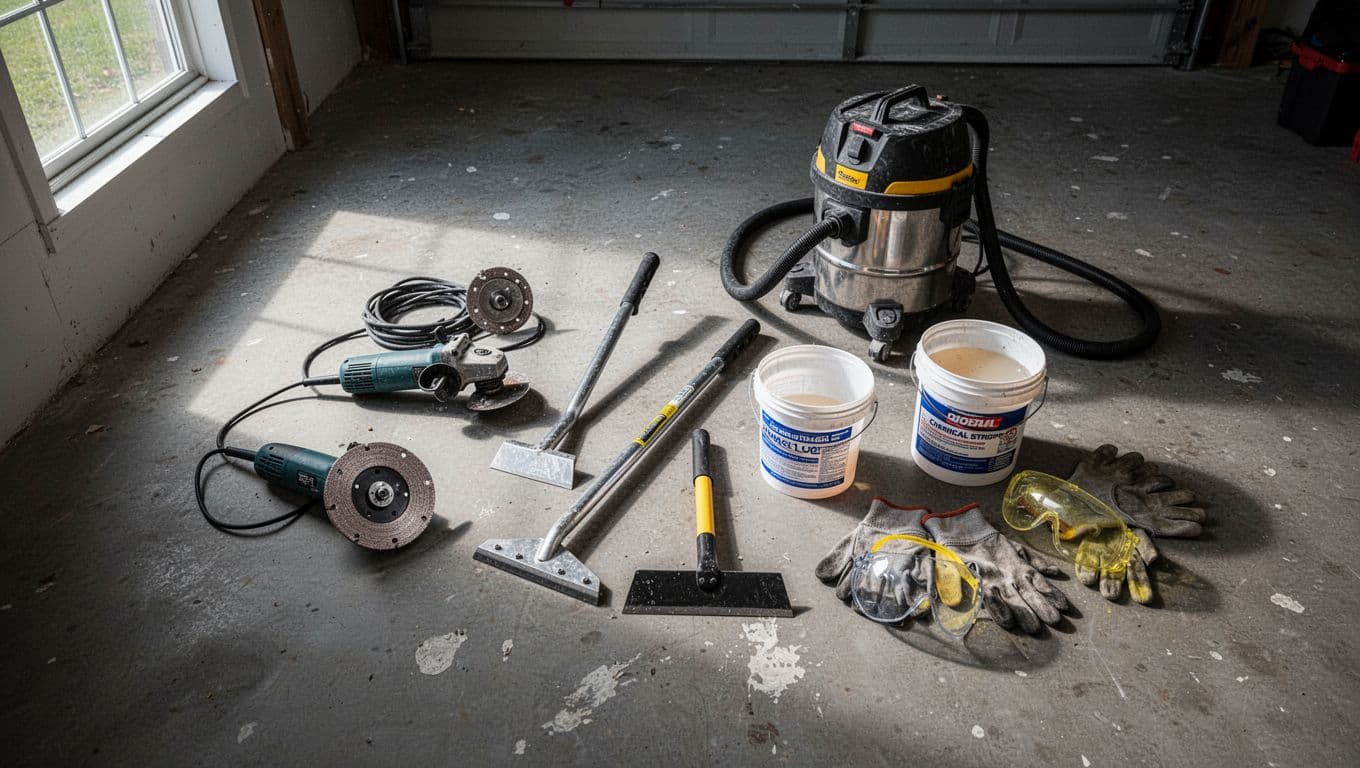
- A long-handled floor scraper and a stiff razor scraper
- A shop vac, preferably with HEPA filtration
- Nitrile gloves, eye protection, and a proper respirator
- Plastic sheeting and tape for dust control
- A mastic remover or adhesive stripper for stubborn spots
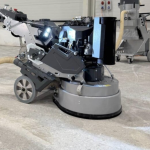
- An angle grinder with dust shroud and diamond cup wheel, only when safe to use
Ventilation matters too. Open windows when possible, and use a fan that blows air out of the room, not across it. If you’re working in a basement, block off nearby rooms so dust and fumes don’t travel.
Keep the floor as dry as the product allows. Some removers leave an oily film, and too much rinse water can slow the next step. That’s a problem if you’re planning a basement concrete coating later.
A step-by-step way to remove glue and mastic from concrete
Start small. Pick a two-foot test area and learn how the residue reacts before you commit to the whole room.
- Scrape the loose material first. Hold the scraper low and push under the adhesive, not straight down into the slab. Brittle glue often comes up in flakes.
- Use a remover only where dry scraping stalls. Apply it to a small area, let it dwell as directed, then scrape again. Don’t spread it over the whole floor at once.
- Vacuum and wipe as you go. That keeps you from tracking softened adhesive back across clean concrete.
- Grind only after you know the material is safe. Grinding works well for thin, stubborn residue, but it creates dust fast. Use a shrouded grinder attached to a vac.
A few common problems trip people up.
If the adhesive smears, the remover may need more dwell time, or the room may be too warm. If the scraper chatters across the slab, switch blade angles. If the floor still feels tacky after scraping, you probably need another pass and a careful final cleaning.
Don’t chase perfection too early. First remove the bulk. Then deal with the thin film left behind.
For thick residue, mechanical scraping usually comes first. For thin film, a grinder may finish faster. For black unknown mastic, caution comes first, always.
How to prep the slab for tile, vinyl, laminate, or epoxy
Once the residue is gone, the slab still needs prep. A floor can look clean and still be unfit for the next layer.
Tile is usually the most forgiving. Thinset bonds well to clean, solid, porous concrete. Vinyl and laminate are less forgiving, because bumps, residue, and moisture telegraph through fast. For glue-down flooring, the slab needs to be smooth, dry, and free of soft adhesive.
A simple water-drop test helps. Sprinkle a little clean water on the slab. If it beads, something is still blocking the surface. If it darkens the concrete and absorbs, the slab is more open.
Prep matters even more for coatings. A concrete epoxy coating, any epoxy coating for concrete, or an epoxy coating for garage floor won’t bond well over old glue haze. The same goes for a commercial concrete epoxy coating or a basement concrete coating system. If you’re comparing products, a good epoxy concrete coating page will always come back to prep, because that’s where most failures start.
Some floors get a polyaspartic coating topcoat after epoxy. Others may be better suited for concrete polishing or concrete staining if you want the slab itself to stay visible. A reputable garage floor epoxy coating company should say the same thing a careful DIYer learns fast, good results start with honest surface prep, not wishful thinking.
That’s also where smart concrete dealing comes in. If the slab is cracked, damp, weak, or contaminated deep below the surface, no finish will hide it for long.
Concrete doesn’t reward shortcuts. But it does reward a methodical approach.
When you identify the residue, control dust, and prep the slab for the finish you actually want, the job stops being guesswork. It becomes a clean, solid base that won’t fight you later.
Comments are closed