Concrete pitting can make a slab look deceptively harmless until your chosen finish turns every crater into a visible shadow line. If you skip essential pitted concrete repair, your grinding process becomes unnecessarily messy, coatings fail to bond across weak spots, and polished floors highlight every flaw in the surface.
Before you begin comprehensive surface preparation, ensure all repairs are structurally sound, perfectly level, and completely free of oil, dust, and loose debris. This attention to detail is critical whether you are applying an epoxy coating for concrete, performing professional concrete polishing, or installing decorative stains and overlays. Properly patching these areas ensures that any subsequent concrete sealer you apply will provide durable, long-term protection for your floor.
A clean, thorough repair now saves significant time and money later, because the quality of your finished floor only works as well as the slab beneath it.
Key Takeaways
- Evaluate Slab Integrity: Before patching, test for structural soundness by tapping the surface; avoid filling areas that sound hollow or crumble, as these may indicate deeper slab failure.
- Prioritize Surface Prep: Success depends on removing all oil, dust, and loose debris from the pits, as any residue will prevent the patch from bonding and likely cause it to pop loose during grinding.
- Match Materials to Finish: Choose patching compounds compatible with your final application—such as epoxy mortar for coatings or high-strength cement for polished floors—to ensure consistent hardness and wear.
- Allow Proper Curing: Always respect the curing times of your chosen repair material; grinding too soon can tear the patch out or leave it uneven, compromising the final look of your coating or polish.
Know when pitting is patchable, and when it isn’t
Concrete pitting is surface loss rather than just a cosmetic quirk. This type of damage often stems from environmental stressors, such as harsh freeze-thaw cycles and the regular application of deicing salts, which accelerate the breakdown of the slab surface. Other common culprits include heavy tire traffic, moisture trapped beneath old floor systems, and poor initial finishing. If the concrete paste was weak during the pour, it may have suffered from aggregate segregation, leading to a brittle surface that flakes away over time. While an epoxy coating can hide minor color variations, it cannot provide structural integrity to a soft or crumbling surface.
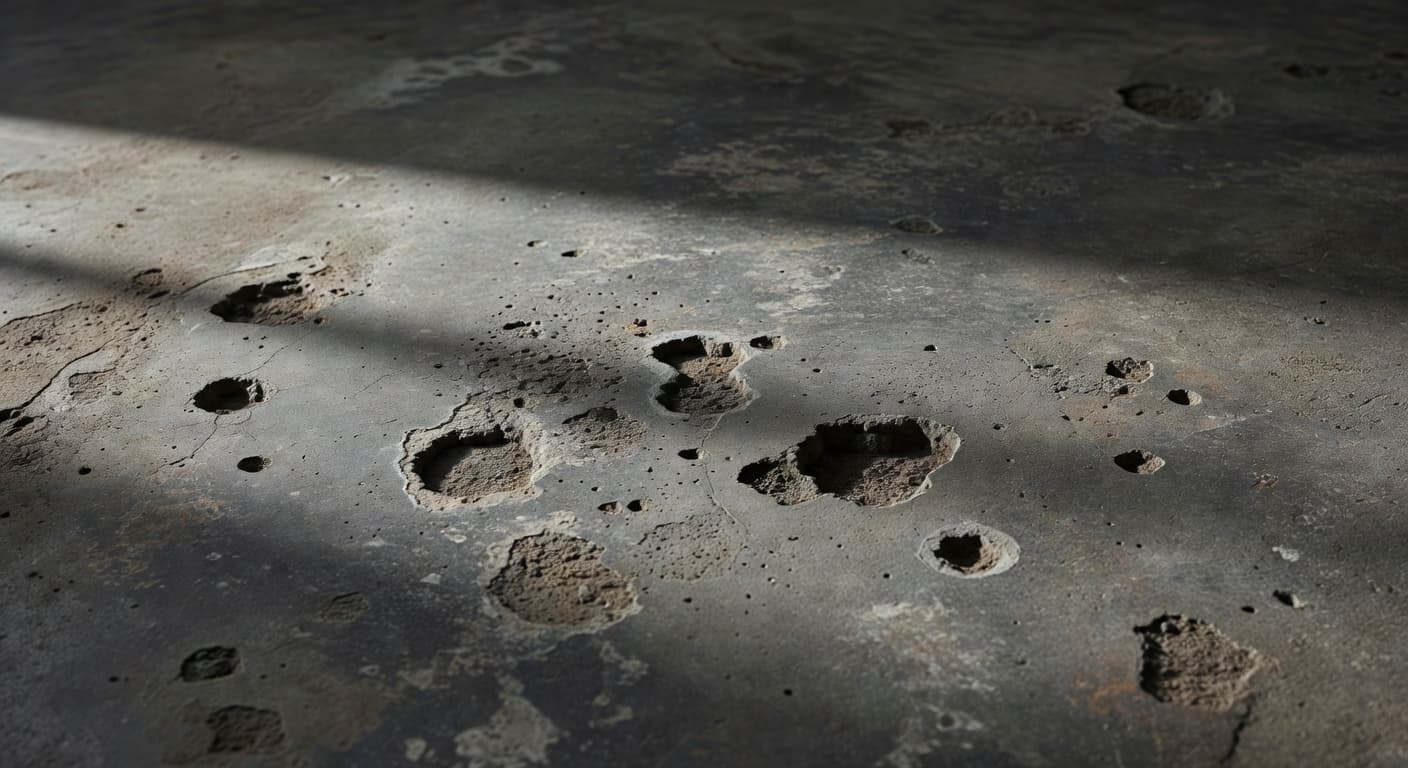
Small areas of concrete pitting are usually patchable when the surrounding slab remains hard and dry. You can test the integrity by tapping the area with a hammer. If the concrete sounds solid and does not flake or powder under a screwdriver, you can generally clean the area, fill it, and grind it flush.
However, you should step back if the damage is widespread or indicative of deeper issues. Extensive scaling, chalky paste, moving cracks, dark damp spots, or hollow sounds often point to significant structural damage. When the slab itself is failing at a deeper level, a simple skim coat will not provide a long-term fix.
The planned finish also changes your repair strategy. For a high-quality epoxy coating for garage floor use, the bond strength and surface profile are the most important factors. Concrete polishing requires dense, high-strength repairs that will not tear under diamond tooling, while concrete staining often highlights patches, making visible consistency a challenge.
If you are lining up repairs before a new application, this garage epoxy prep checklist helps you spot surface problems that should be resolved before primers or base coats go down.
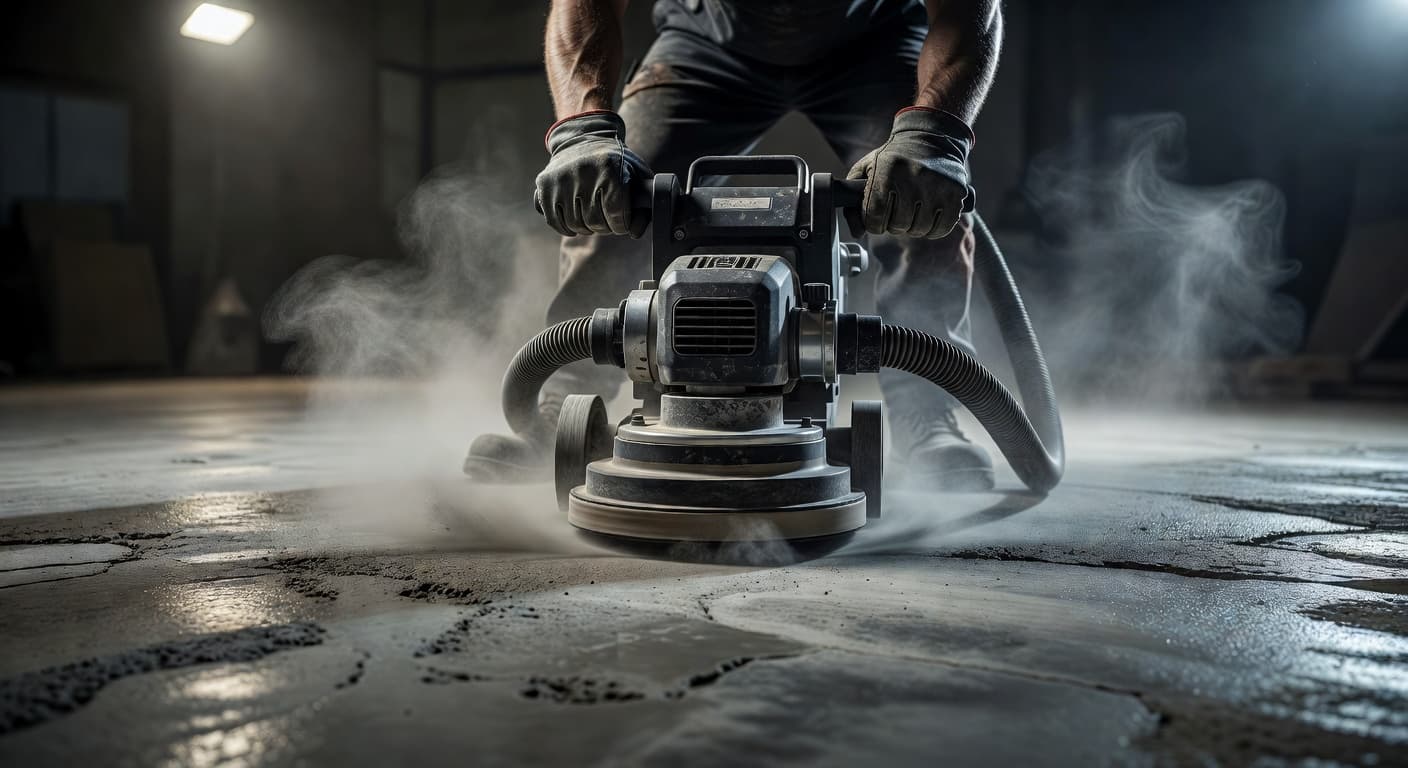
Repair the pits before you grind the whole floor
Gather the essentials before you begin: a hammer, chisel, vacuum, degreaser, concrete grinder, mixing paddle, margin trowel, and straightedge. For the filler, select a product suitable for your specific floor, such as epoxy mortar, epoxy gel patch, polymer-modified cement, or a durable quick setting cement.
Some crews categorize this stage under concrete sealing, but the objective is straightforward. Remove loose debris, thoroughly clean the cavity, apply the filler, and ensure the slab is level for the subsequent prep pass.
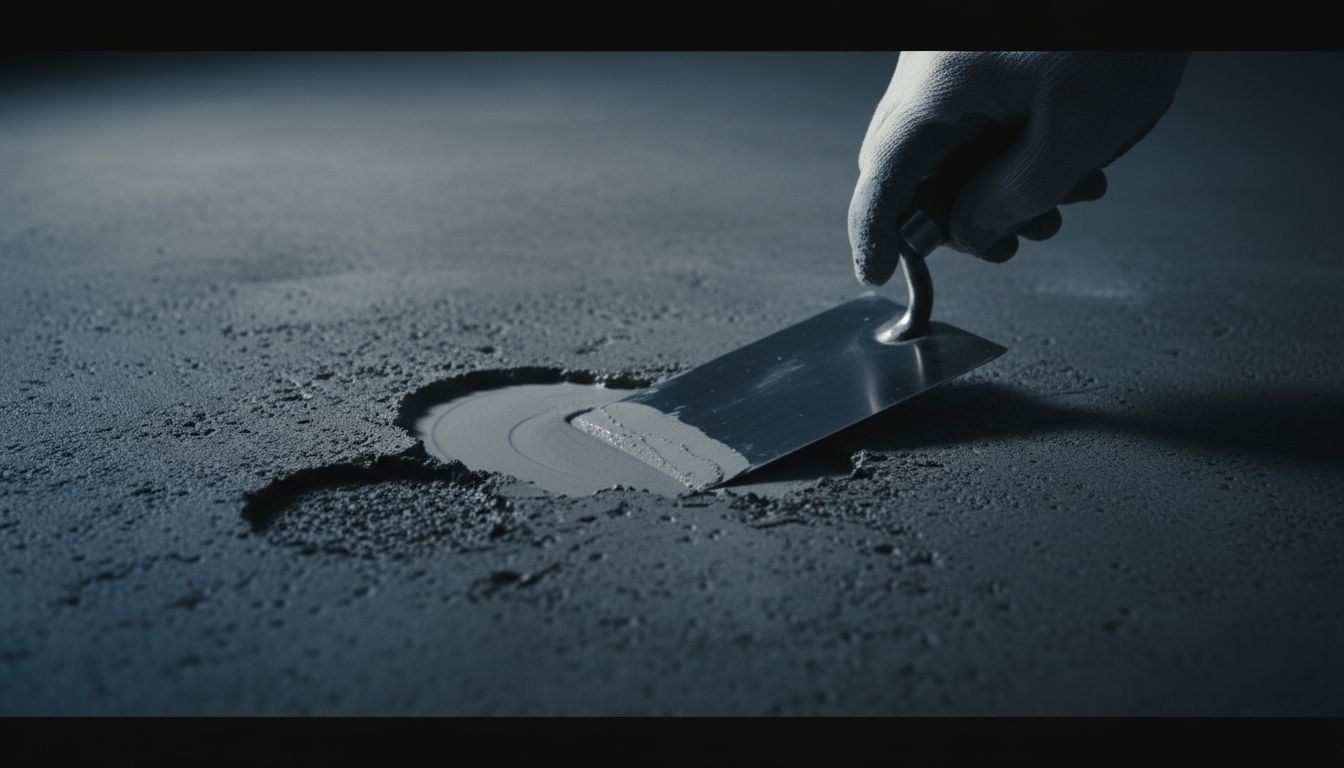
- Remove all loose debris. Chip or grind the area until every pit has firm, stable edges. Feathering over dust or soft paste often creates a patch that will eventually pop loose.
- Clean beyond the visible dirt. Vacuum the pit and scrub away any lingering oil. For deep pits, using a pressure washer can help remove hidden contaminants, but ensure the slab is completely dry before proceeding. If moisture or residue remains in the pores, the repair may shear off during final grinding or application of the coating.
- Create the right profile around the repair. Light grinding gives the patching compound a better mechanical bite. Always apply a quality bonding adhesive before filling the void to ensure a lasting interface. When preparing the full floor, compare shot blasting and grinding to ensure your chosen surface profile matches the requirements of your specific floor system.
- Pack the repair material tightly. Use a thin epoxy paste or slurry for pinholes and shallow pitting. Use a high-strength mortar for larger voids, filling the area slightly higher than the floor surface. Use a concrete trowel to level the material and ensure a smooth transition.
- Respect proper curing times. While some fast-set products harden in hours, others require significant time. Grind the patches too soon and you risk tearing them out before the primer, stain, or high-performance polyaspartic top coat is applied.
Material choice depends on the finish. For basement concrete coating work, moisture requires extra attention because damp edges can compromise the bond. On commercial concrete epoxy coating jobs, ensure the patch hardness is compatible with the surrounding slab so traffic does not cause uneven wear.
After curing, grind the patches flush, vacuum the area again, and verify the surface with a straightedge. A patch that looks smooth but sits too high will inevitably print through thin finishes.
Check the slab before coatings, polish, or overlay work
A repair is not done simply when it looks smooth. It is only finished when it is hard, flat, dry, and free of residue. Run a straightedge across patched areas, scrape them with a putty knife, and vacuum the surface again before beginning your main prep pass.
If you are hiring a professional concrete contractor for a garage floor, driveway, sidewalk repair, or concrete patio project, ask what patch product they use, how long they let it cure, and whether they grind repairs flush before application. Clear answers usually point to better prep. If a slab is consistently failing, a pro should also verify the water-cement ratio of the concrete mix to ensure the structural integrity of the base.
Use this short checklist before you move to grinding, coating, polishing, or overlay work:
- Every repair sounds solid, with no hollow tone or crumbling edge.
- Patched areas sit flush, or slightly high and ready for final grinding.
- No oil, curing compound, sealer, paint, or dust remains.
- The repair material matches the planned finish, whether that is for a decorative polish, a stain, or a heavy-build system.
- Large low spots and high ridges are addressed with concrete floor leveling techniques, not hidden under thick material.
That last point matters significantly. Whether you are applying a protective coating or finishing concrete resurfacing, none of these products should be asked to level an uneven slab. A smooth, durable finish depends on a properly prepared, level substrate.
Frequently Asked Questions
Can I fill concrete pits with standard cement or concrete patch from a hardware store?
While basic patch materials work for minor cosmetic fixes, they often lack the bond strength and durability required for heavy traffic or industrial coatings. For professional results, you should select high-performance epoxy gels or polymer-modified cements that match the hardness of the surrounding slab.
How do I know if the concrete pitting is too severe to repair?
If the concrete sounds hollow when tapped with a hammer, crumbles into powder under a screwdriver, or shows signs of persistent dampness, it is likely structurally compromised. In these cases, a simple patch will not hold, and you should consult a professional to determine if the slab needs more extensive restoration.
Should I patch the pits before or after I grind the floor?
It is generally best to perform rough cleaning and patching before your final surface prep pass. By filling the pits and allowing them to cure, you can then grind the patches flush with the rest of the floor, creating a seamless, uniform profile for your chosen coating or polish.
Why do my concrete patches keep popping out after I apply a coating?
Patches usually fail because of improper cleaning or lack of mechanical profile within the pit. If you do not remove all loose debris, oil, or dust, the repair material cannot bond properly, leading to failure when the floor experiences traffic or thermal expansion.
Final thoughts
Small pits can be patched, but weak concrete cannot be ignored. Successful concrete resurfacing projects start with repairs that are solid, level, clean, and fully cured. Proper pitted concrete repair is the foundation for a long lasting floor, whether you are applying an epoxy coating for concrete, decorative stains, or polished finishes.
When the slab sounds hollow, stays damp, or continues to shed surface paste, you should stop and get a professional evaluation before investing in a new layer. Addressing concrete pitting early ensures your floor prep work is effective and durable. As a final step, applying a high quality concrete sealer will protect your hard work and help prevent future surface damage.
Comments are closed