
A coating can look perfect on day one and still fail fast if the slab underneath is too smooth or too rough. That “feel” of the concrete is called concrete surface profile, and it’s one of the main reasons coatings bond well (or don’t).
If you’re planning an epoxy, polyaspartic, or overlay system, CSP helps you choose the right prep method and the right level of grinding or blasting. In this guide, you’ll learn what CSP means, how to match it to common systems, and how to avoid the mistakes that lead to peeling and hotspots.
What concrete surface profile really means (and why it matters)
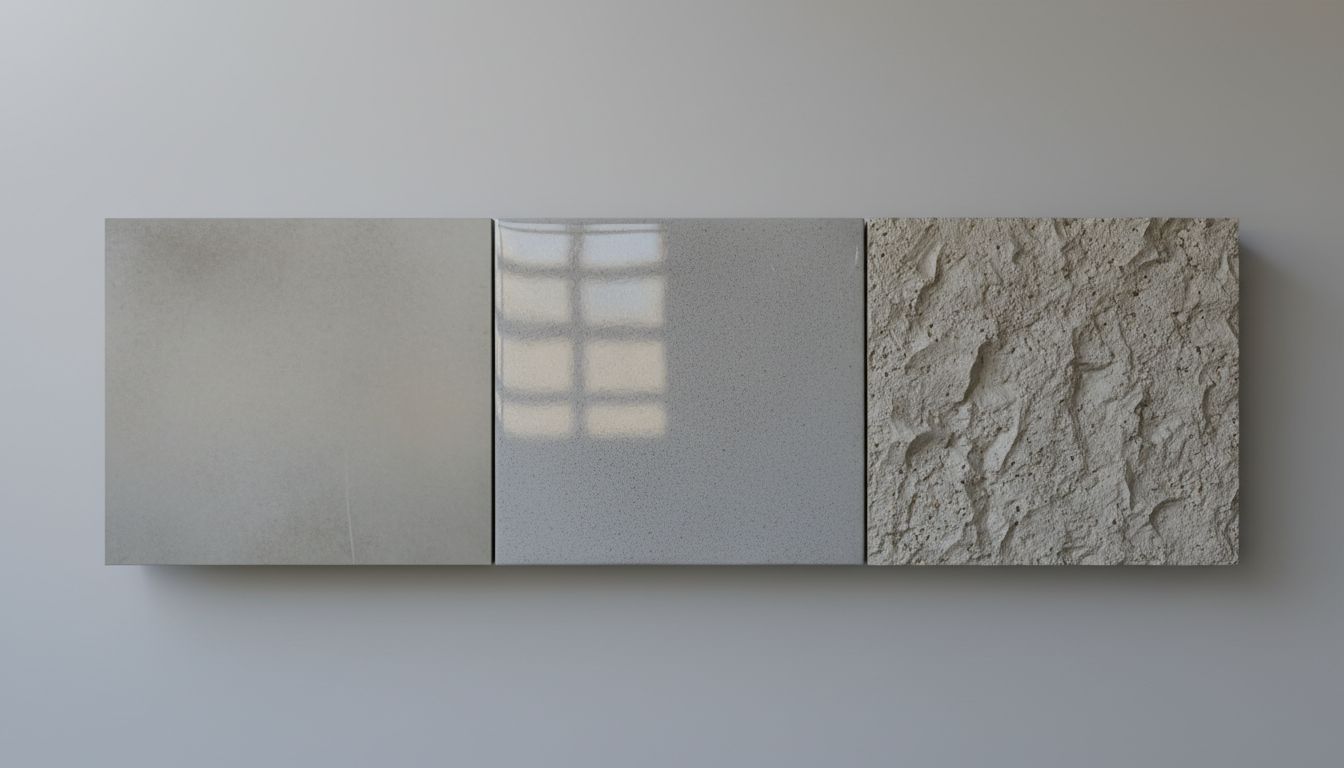
Concrete surface profile is the texture of the concrete surface after prep. Think of it like sandpaper grit, but for slabs. A low CSP feels almost smooth. A high CSP has deeper peaks and valleys.
Why does it matter? Because coatings and overlays don’t just “stick,” they lock in mechanically. The right profile gives the material something to grab. Too little profile and you risk poor adhesion. Too much profile and thin coatings may bridge over sharp peaks, leaving voids and weak spots.
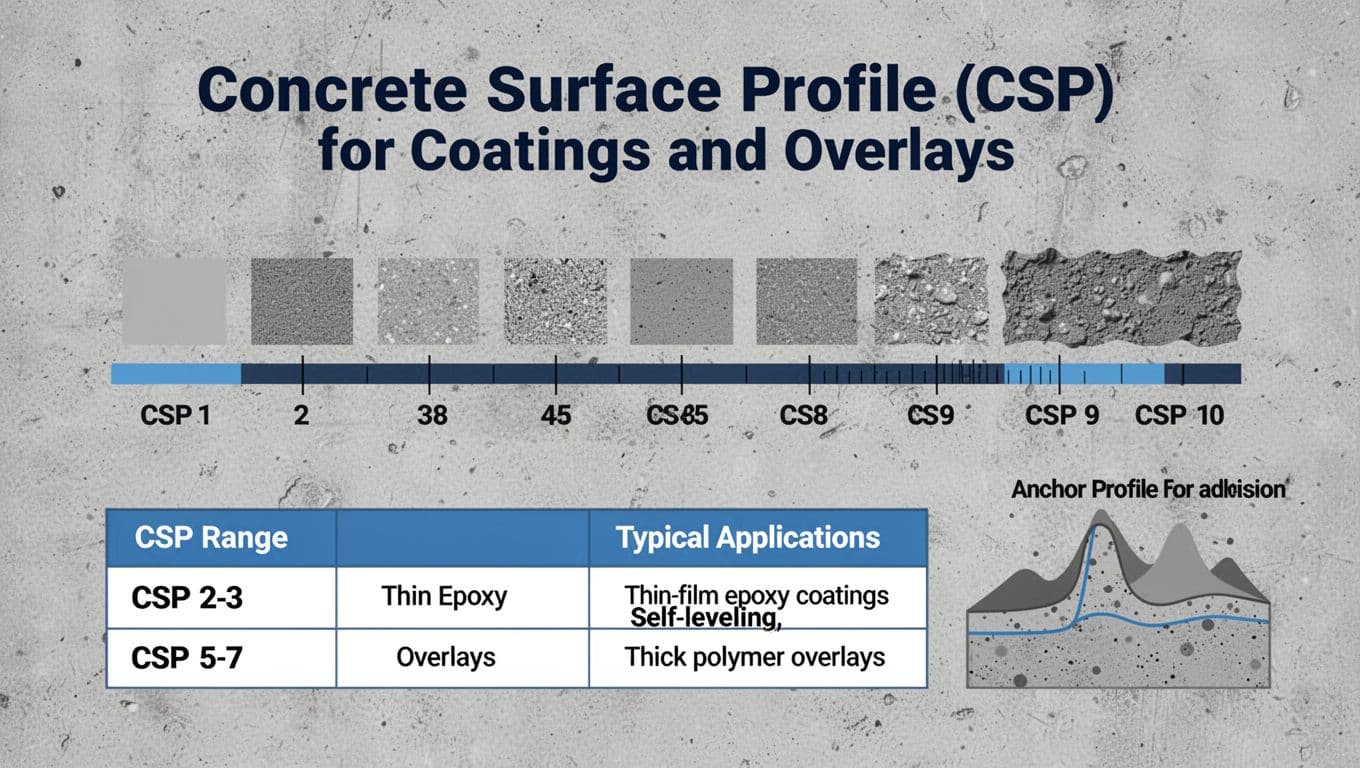
Most teams reference the ICRI CSP scale, which runs from CSP 1 (very smooth) to CSP 10 (very rough). It’s communicated using visual comparators (often called CSP “chips”) so a designer, owner, and installer can talk about surface roughness the same way. For background on how ICRI frames selection and specification, see the ICRI guideline discussion (PDF).
Two quick clarifiers help on real projects:
- CSP is not “cleanliness.” You can have a rough surface that’s still contaminated with oil or curing compounds.
- CSP is not “flatness.” You can grind to a target profile and still need patching or self-leveling for waves and birdbaths.
That’s why surface prep is a package: profile, cleanliness, soundness, and moisture all have to line up.
Matching CSP to epoxy, polyaspartic, and overlay thickness
CSP selection starts with one practical question: How thick is the system? Thin films can’t hide deep texture. Thicker overlays can.
Below is a common, field-friendly way to think about typical ranges. Always confirm the product data sheet, because resin types and aggregate loads change the target.
| System (examples) | Typical build | Common CSP range (typical) | Prep method often used |
|---|---|---|---|
| Clear sealers, thin polyaspartic coating topcoats | Very thin | CSP 1 to 3 | Diamond grinding, light shot blasting |
| Thin-film epoxy coating for concrete (including many primers) | Thin | CSP 2 to 3 | Grinding or shot blasting |
| Broadcast quartz or flake concrete epoxy coating systems | Medium | CSP 3 to 5 | Shot blasting, aggressive grinding |
| Commercial concrete epoxy coating in wear zones (forklifts, washdowns) | Medium to thick | CSP 3 to 6 | Shot blasting, scarifying then grind |
| Self-leveling overlays and polymer-modified toppings | Thick | CSP 4 to 7 | Shot blasting, scarifying, scabbling |
| Cementitious repair builds and heavy resurfacing | Very thick | CSP 6 to 9+ | Scarifying, scabbling |
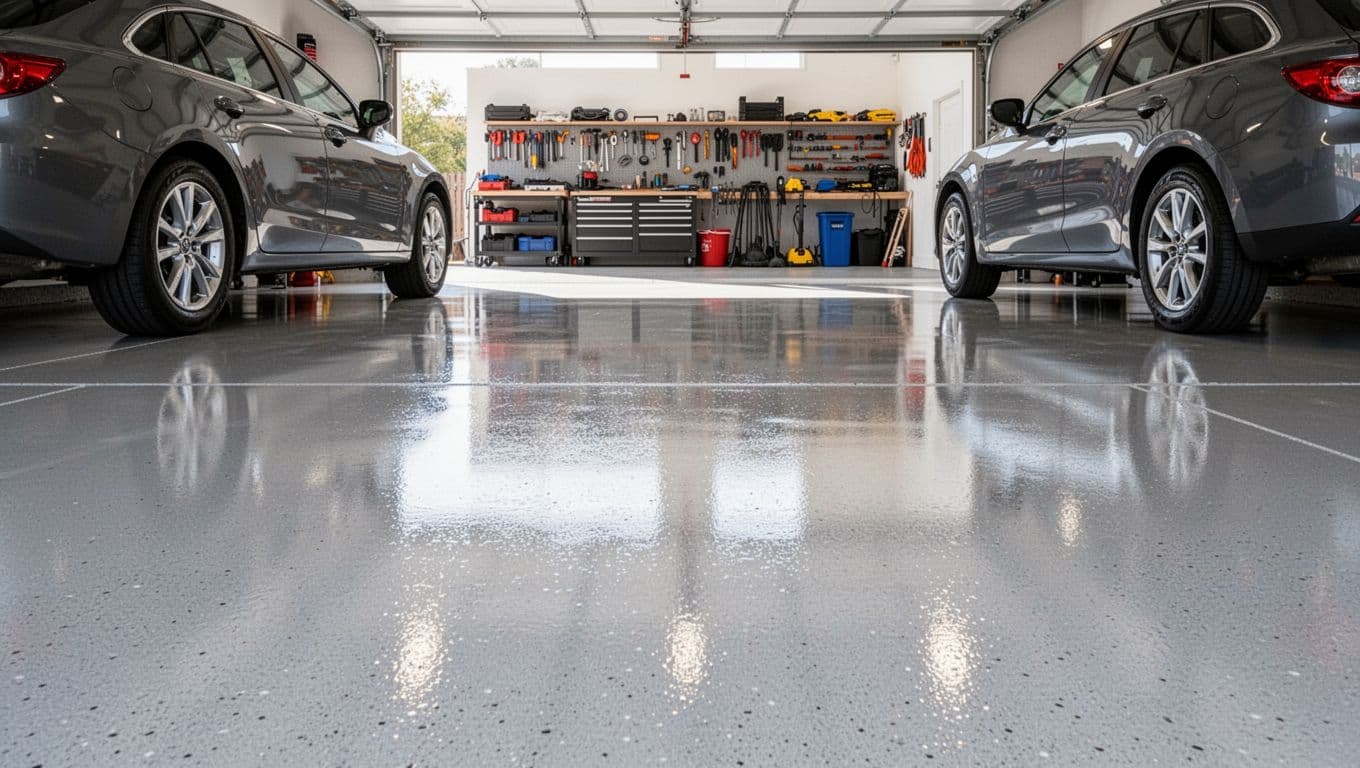
The same logic applies at home. An epoxy coating for garage floor often performs best when the slab has enough tooth for bond, but not so much that the coating telegraphs texture. If you’re hiring a garage floor epoxy coating company, ask how they verify the profile after prep, not just how they “diamond grind.”
Here’s a simple decision flow you can use in a scope meeting:
- Name the system and thickness (epoxy, polyaspartic, overlay, broadcast, self-leveling).
- Pick a CSP range from the manufacturer guidance (use a range when allowed).
- Choose the prep method that reliably creates that CSP on your concrete hardness (grind vs shot blast vs scarify).
- Check slab risks: moisture vapor, weak surface paste, old adhesives, densifiers, or sealers.
- Verify before coating: compare to CSP chips, confirm cleanliness, then patch and detail.
If the surface looks “perfectly smooth,” it might be too smooth. Adhesion likes a little tooth.
Special note for decorative work: concrete staining and many dye systems often need a different approach. They may call for cleaning and opening pores without creating an aggressive texture that shows through.
How crews hit and verify the right CSP on site
Getting to a target CSP is less about brand names and more about matching the tool to the slab.
Diamond grinding is controlled and common for coatings. It also supports edge work and detail areas. However, grinding can polish high spots if the tooling is too fine, which is the opposite of what most coatings need. On the other hand, aggressive metal-bond diamonds can create a strong profile quickly, then a second pass can knock down sharp ridges.
Shot blasting is often the most consistent way to create a uniform CSP across open areas. It also removes weak paste well. Many specs prefer it for larger floors because it reduces “swirl” patterns that can happen with inexperienced grinding.
Scarifying and scabbling are for heavier removal, thicker overlays, or damaged slabs. Most teams follow these with grinding to remove ridges and create a more even surface.
Verification matters because everyone’s idea of “rough enough” differs. Visual comparators help, but measurement tools are getting more common too. For an overview of options, see how CSP can be measured digitally.
Don’t ignore adhesion concepts while you’re here. Many projects also use pull-off testing (common ASTM approaches exist for concrete coatings) when risk is high or when failure would be costly. Moisture testing (often performed using methods such as ASTM F2170) also prevents a lot of surprise callbacks, especially on a basement concrete coating where vapor drive is common.
Finally, remember that concrete polishing is its own finish category. Polished floors chase smoothness and clarity, so the prep targets differ from coating targets.
Safety, dust control, and the mistakes that cause coating failures
Surface prep creates dust, and concrete dust can contain respirable crystalline silica. That’s why good crews treat dust control as part of quality, not just safety.
A few practices show up on well-run jobs:
- Use grinders and blasters with shrouds and HEPA vacs, and keep filters maintained.
- Set containment indoors when needed, including negative air on sensitive sites.
- Plan for edges and corners early, because hand work can change CSP fast.
- Keep the floor protected after prep. On busy sites, concrete dealing (forklifts, pallet staging, other trades walking through) can re-contaminate the surface in a day.
For broader prep practices around repairs and overlays, the Bureau of Reclamation prep best practices report is a solid reference.
Common mistakes to avoid: relying on acid etching as a one-step prep; skipping vacuuming after grinding; leaving curing compound or sealer in place; choosing a CSP that’s too high for thin films; coating before moisture and patch materials are ready.
Conclusion
Concrete surface profile isn’t a paperwork detail, it’s the difference between a coating that bonds and one that peels. When you match CSP to thickness, verify it on site, and control dust, you remove most of the risk. Keep the goal simple: a sound, clean, properly textured surface that fits the system you’re installing. If you’re unsure, confirm the CSP range in the product data sheet before you start grinding.
Comments are closed